SEGA Mega Dive Toolchain and GameJam
Introduction
The Sega Mega Drive was my first console, so I was excited to jump at an opportunity to utilize and contribute to the amazing community around it!
I was lucky to be able to cover the creation of a team- & network-based development / creation toolchain for the Sega Mega Drive, as part of my bachelor thesis. Beyond uncovering the limits of team-based development utilizing both classic 68K assembly and modern frameworks such as SGDK, I chose sensible software options for many tasks and streamlined them into a simple toolbox program.
This toolbox is mainly used for mounting of virtual drive directories for the selected team-role, as well as setting up the git version control directories and credentials. The program was put to the test in a 12 hour gamejam, producing a simple run and gun shooter, we named “Cyborg Jäger”.
GameJam results
Before I loose your interest with more retro tech babble, let me show you some of the results:
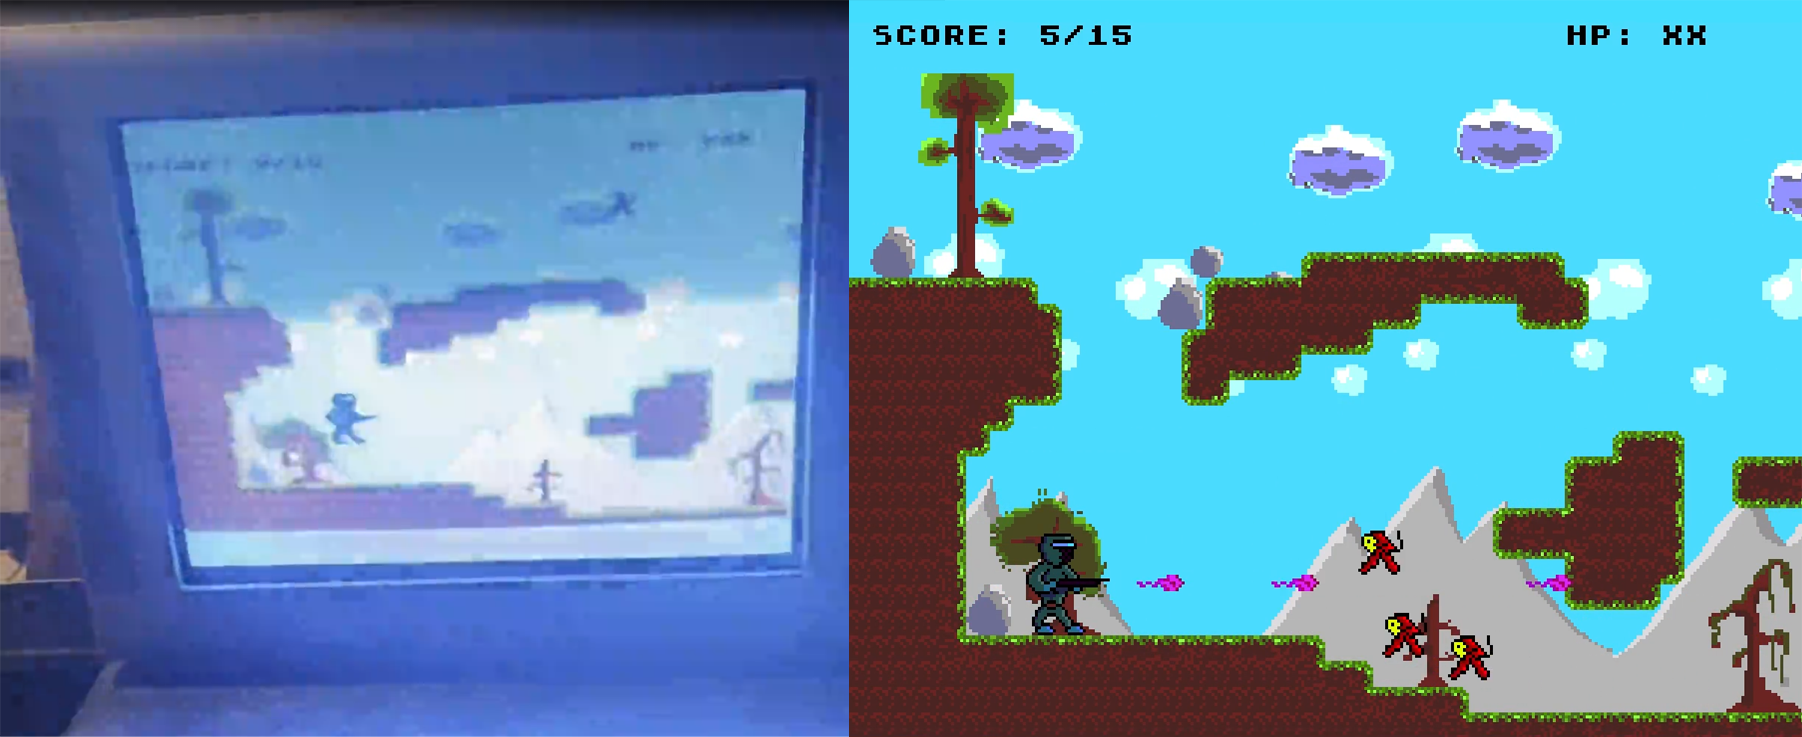
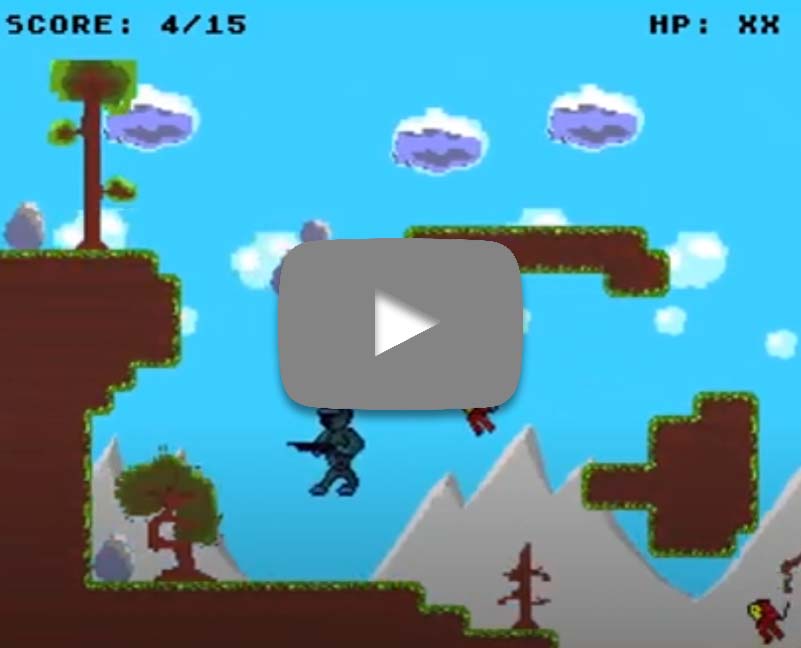
After building a team-based devlelopment toolchain / pipeline for homebrew Sega Mega Drive development, using SGDK, I put it to the test with a game jam. I invited 6 friends who each had pre existing abilities in programming, art or design. Utilizing the established server and toolbox of ESTB, we held a game jam to create a funcitoning homebrew game for the Sega Mega Drive, within 12 hours.
Of note is the fact that no team member had ever worked with the chosen tools or had any experience with homebrew development whatsoever. Through good documentation and the streamlined nature of both the SGDK framework and my ESTB application, we were still abe to create a functioning game in a short amount of time.
A result, which certainly wouldn’t have been easily possible a few years ago! The game itself is a very simple run and gun game in which the titular Cyborg has to hunt small, bouncy red monkeys. If the monkeys touch him, he looses a health point, if they are shot, they despawn. The map is limited, but can be traversed with jumping. If 15 monkeys are eliminated, the game is won and restarts.
Fairly simple stuff, but considering we crammed in sprite art & animations, tilesets, paralax scrolling, music and precise collision detection, all while each team member had to learn their tools (Aseprite, Deflemask, VSCode, etc.) as they went, is decently impressive. 
Building the game ROM yourself
First, clone the game repository from my Gitlab.
The toolchain is focused around SGDK as a starting point, especially for it’s resource compiler. Setting up SGDK is quite simple. For Windows, simply follow the official instructions on how to setup SGDK.
For Linux and Mac, ports and cross platform implementations exist and are certainly deployable. Our RaspberryPi Server ran a custom Docker SGDK and SNASM build for ARM, facilitating basic server-side build automation. Compilation and asset management is all handled within SGDK itself, so no other dependencies should be needed to build the ROM.
For writing code, VSCode and the amazing Genesis Code Plugin are a no-brainer, much more capable and useful than most typical IDEs for this purpose.
Toolbox Program
The toolbox program is a rather simple windows application, designed to streamline the setup of a team-based development project. While the individual elements, like SGDK, Aseprite, Deflemask, etc., are well known, letting uninitiated users access them, while automatically configuring version control, is a large help. It also makes sure that only people of a specific team-role / credentials can commit to the correct branch and utilize ther correct tools.

The tools used as part of this toolchain are not all open-source. Some are paid and closed-source. Even if all were open-source, redistributing all of these in this fashion would still be a legal gray area, even under GPL-3 or MIT. As such, every tool and external template folder contains a text file with a link to where the needed tool can be downloaded from. If special instructions for correct application of the downloaded data is necessary, it will be listed inside the text file as well.
Once all tools are in place, the ESTB folder is to be placed as "C:" on the desired development machine. If a different base path for the folder is desired, the environment variables have to be changed accordingly.
Documents and further references
If this topic sounds interesting to you, feel free to download my Thesis & Research paper on this topic here: It covers both the creation and usage of the toolchain / pipeline and the feasibility of 68K assembly development in the modern day.
🡇 Bachelor Thesis & Research Paper - PDF 🡇
🡇 Colloquium Presentation

 © Luca H. |